The fact that the internet transformed advertising is no secret. Not only is it less costly, but advertising on the internet allows brands to target audiences based on demographics and monitor the performance of their advertisements which can’t happen with traditional media such as TVs, radios, and newspapers. According to PwC’s 2022 Global Entertainment & Media Outlook, advertisers in the US spent $189.3 billion advertising online, which was 2.7 times higher than the $69.7 billion spent advertising on TV. The report projects that by 2026, online advertising spending will be 3.8 times greater than TV advertising. More and more advertisers are placing ads on the internet. How does this affect users’ experience surfing the internet? According to the ad-blocking report by Global Web Index, 40% of the online population blocks ads. The report notes that the top five reasons for user blocking ads are: ads are too many on the internet, too many ads are annoying or irrelevant, ads are too intrusive, ads sometimes contain viruses or bugs, and finally, ads take up too much screen space. With the number of advertisers increasing and some even employing aggressive advertisement techniques, users can end up being helpless with no control over their experience online. However, this doesn’t have to be the case. Tools like Pi-hole allow users to take back control and stop annoying and frustrating advertisements on their devices.
What is a Pi-hole?
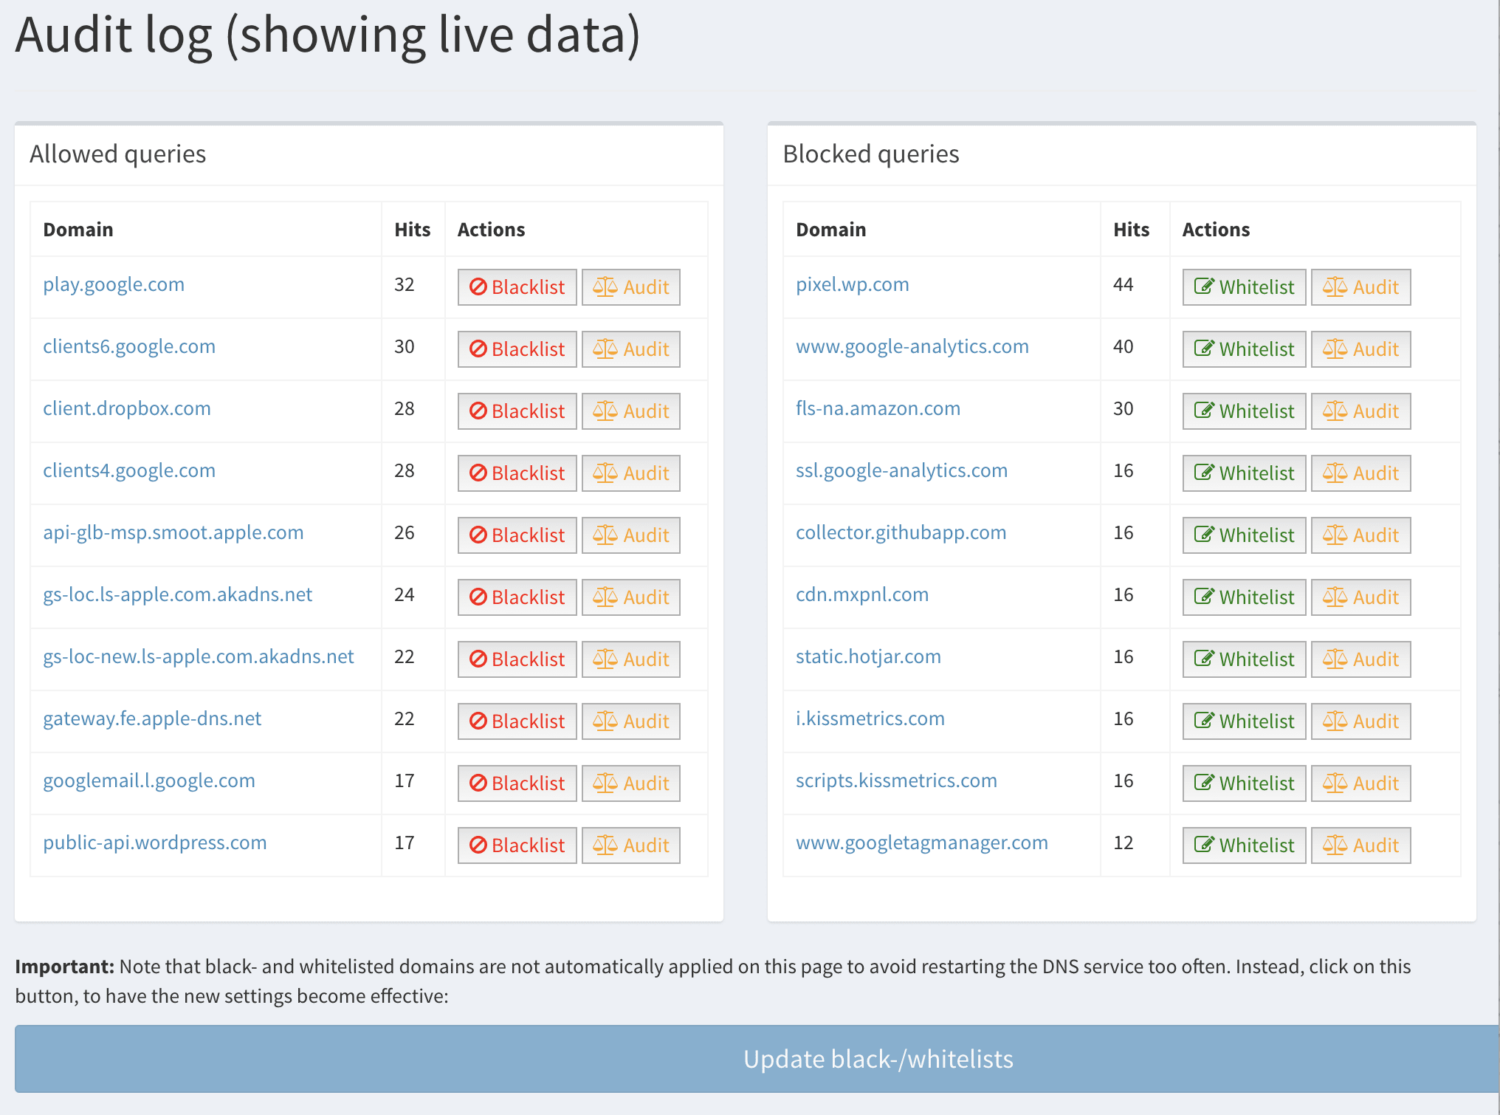
According to its official documentation, Pi-hole is a Domain Name Service(DNS) sinkhole that protects your devices from unwanted content without installing any client-side software. To understand what Pi-hole does, it is essential to know how computers communicate over the internet. Computers communicate with each other through internet protocol(IP) addresses. These are numbers that represent resources on the internet. However, since computers can’t understand the domain names, they must be converted to their respective IP addresses. This is done by the Domain Name System (DNS). The DNS can also block access to sites through DNS sinkholing. A DNS sinkhole is a method used to prevent access to malicious sites or unwanted domains by redirecting requests for those domains to a non-existent or controlled IP address. DNS sinkholing works by configuring a DNS server with a list of domains whose access is forbidden. The DNS server then intercepts DNS requests for access to domain names and compares the requested domain name to its list of forbidden domains. If a match is found, the DNS server returns the configured control or false Ip address thus blocking(sinkholing) access to the requested forbidden domain. Bearing in mind what a DNS sinkhole is, we can thus say that Pi-hole is a network-level, DNS-based ad-blocker that protects networks from advertisements and internet trackers. It acts as a DNS sinkhole, blocking domains that serve ads. It is freely available and can be installed on any Linux computer or Raspberry Pi minicomputer. When Pi-hole is configured as the DNS for a router, ads will be blocked on the entire network. This means that all devices such as phones, computers, game consoles, smart TVs, and other smart appliances, will have an ad-free experience when connected to the network. This is unlike adblockers installed on browsers which only block ads on a single device. To block domains that serve ads, Pi-hole uses a community-maintained block list of websites that serve ads. When a connected device tries to access a domain that serves ads, Pi-hole responds back with an invalid IP address which in turn results in blocking advertisements. The invalid IP address used by Pi-hole is 0.0.0.0
Reasons to Setup Pi-hole
Setting up Pi-hole in a network is very beneficial. Some of these benefits include:
Block ads and unwanted sites on all devices in a network
Since Pi-hole blocks ads at the network level, it ensures that all devices using the network have an ad-free experience. Aside from just ads, Pi-hole allows users to block all websites they consider unsafe for network users. This can be anything from adult websites to websites promoting violence. This way, users, particularly children, are protected from harmful content.
Pi-hole protects users’ privacy
Advertising companies display personalized ads by using trackers to monitor users’ online activity and collect data on their browsing habits. This can be prevented using a Pi-hole which blocks online trackers from protecting users’ privacy. Browsers-based ad-blockers, however, allow trackers to mine the data of users.
Improved network performance
Since Pi-hole blocks unwanted content, it can result in improved network performance by reducing the amount of data needed to be downloaded or processed by devices on the network
Protects devices from malware and other harmful sites
Pi-Hole is very beneficial to any network as it allows users to have an ad-free experience, prevents the mining of their data, protects them from harmful sites, and protects devices from phishing, malware & ransomware sites. It also blocks coin mining networks to prevent devices from being used to mine cryptocurrency without the users’ knowledge or consent.
Pi-Hole Setup Requirements
To install Pi-hole in a home network Pi-hole requires either of the following officially supported operating systems:
Buster/Bullseye release of the Raspberry PI OS on an ARM architecture Ubuntu release 20.x/22.x on ARM/ x86_64 architecture Debian release 10/11 on ARM / x86_64 / i386 architecture Fedora release 35/36 on ARM / x86_64 / i386 architecture CentOS Stream release 8/9 on x86_64
At least 512MB of RAM is required on the computer where Pi-hole is to be installed. A minimum of 2GB of free space is required, even though 4GB is recommended. Finally, an internet connection and access to a router’s admin panel are required to set up and use Pi-hole.
How to set up Pi-hole on Linux
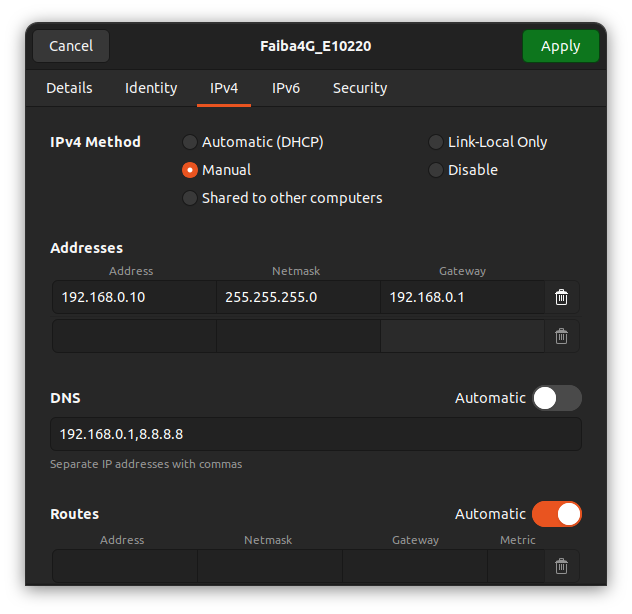
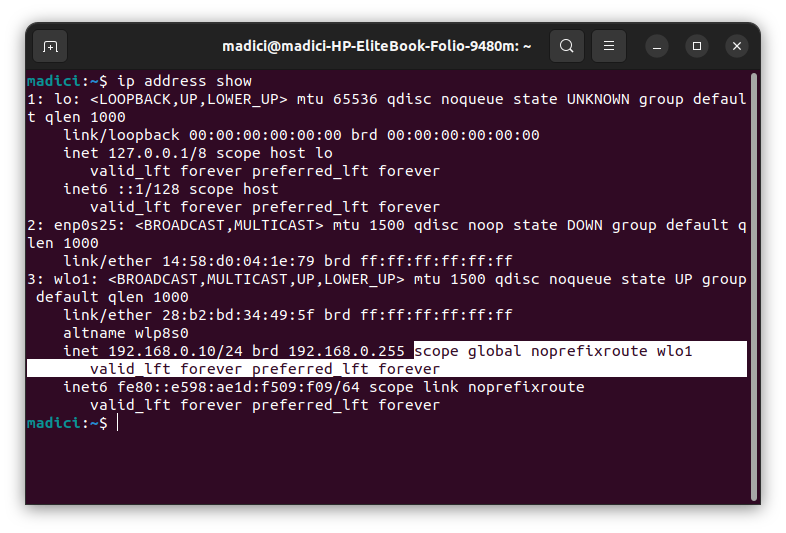
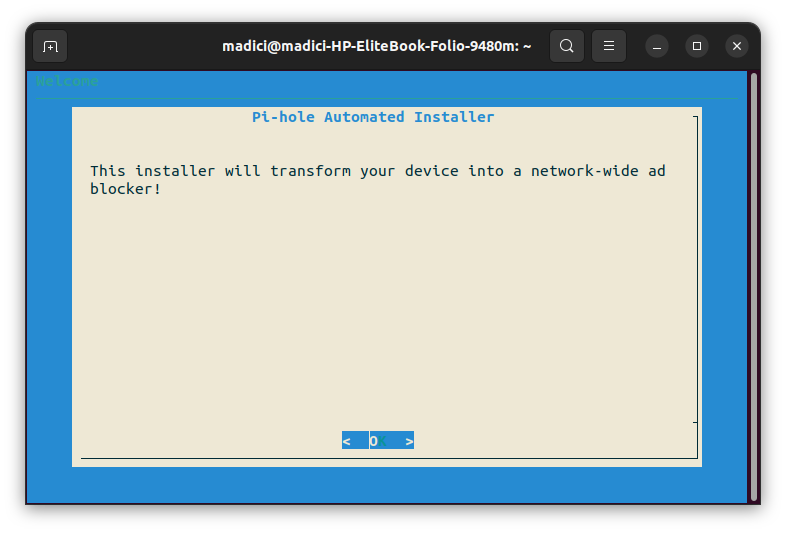
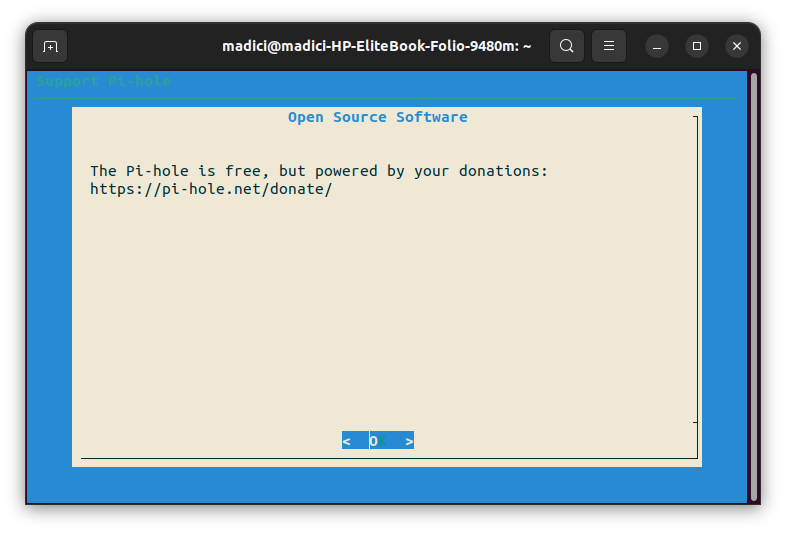
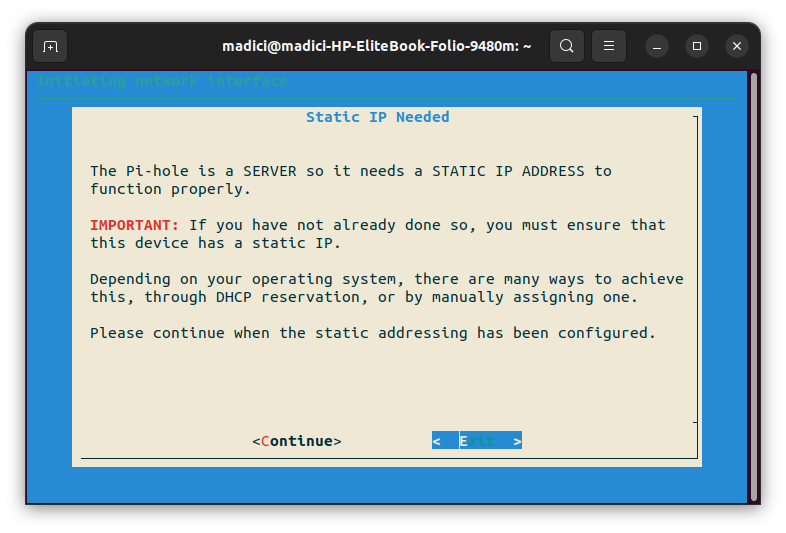
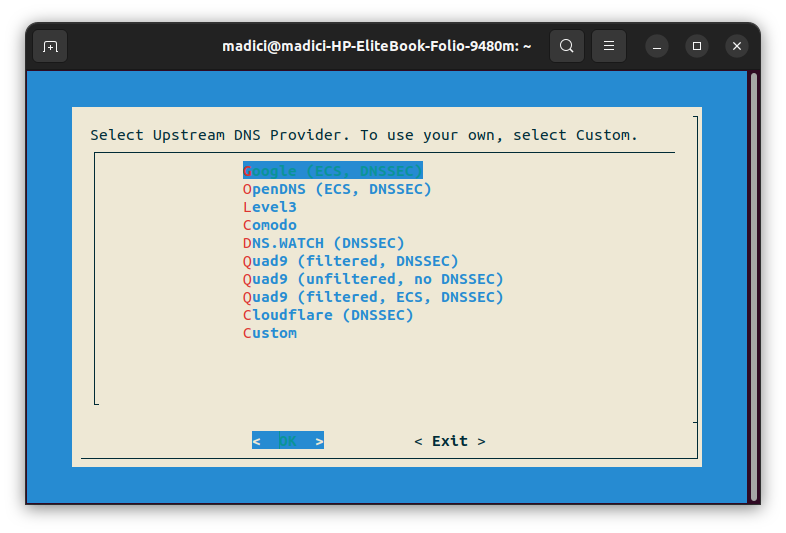
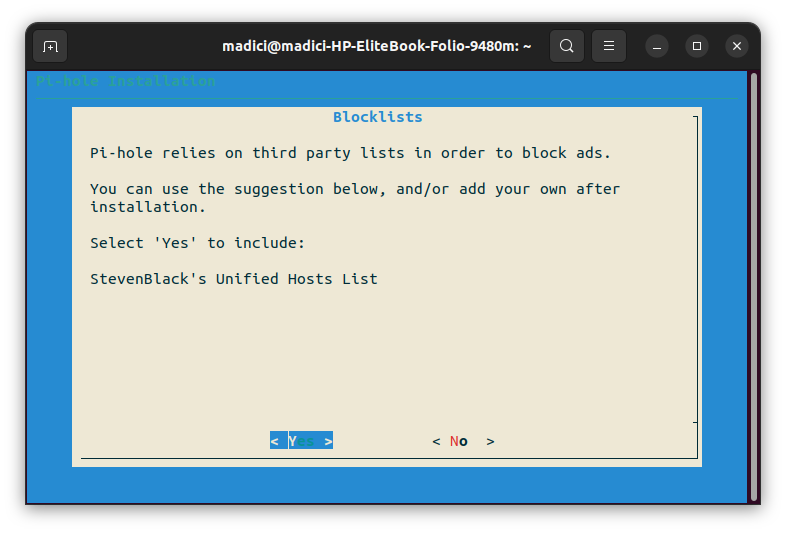
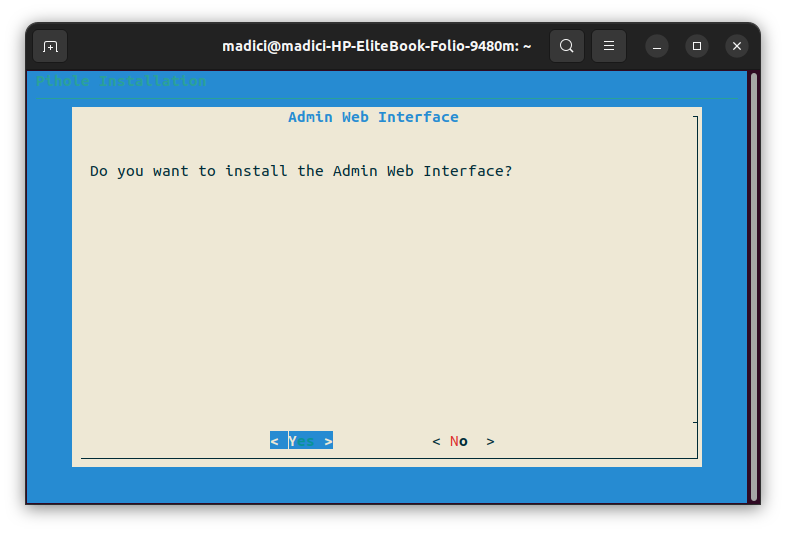
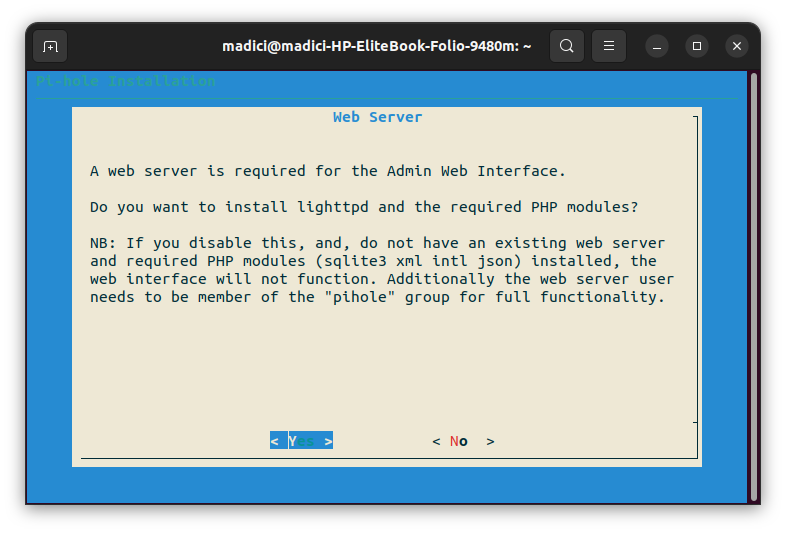
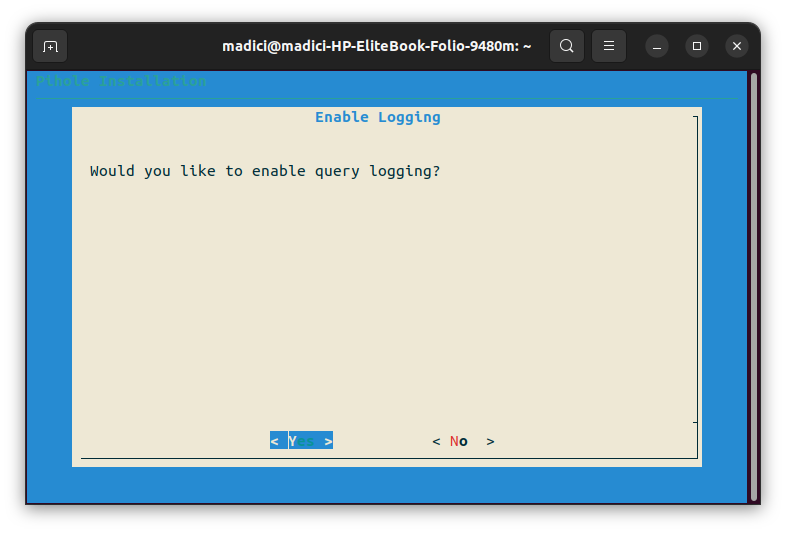
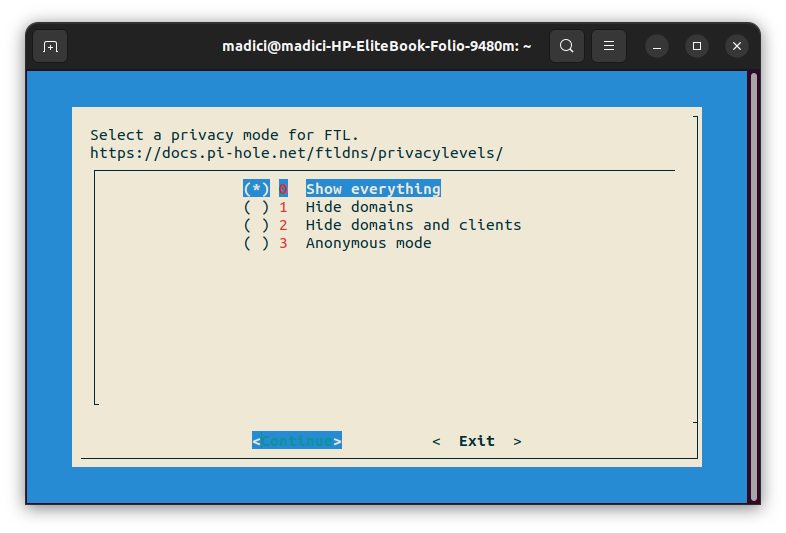
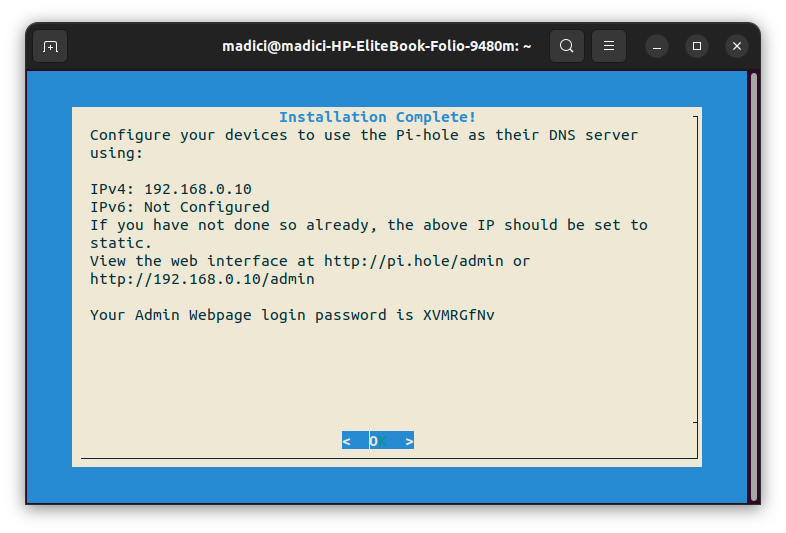
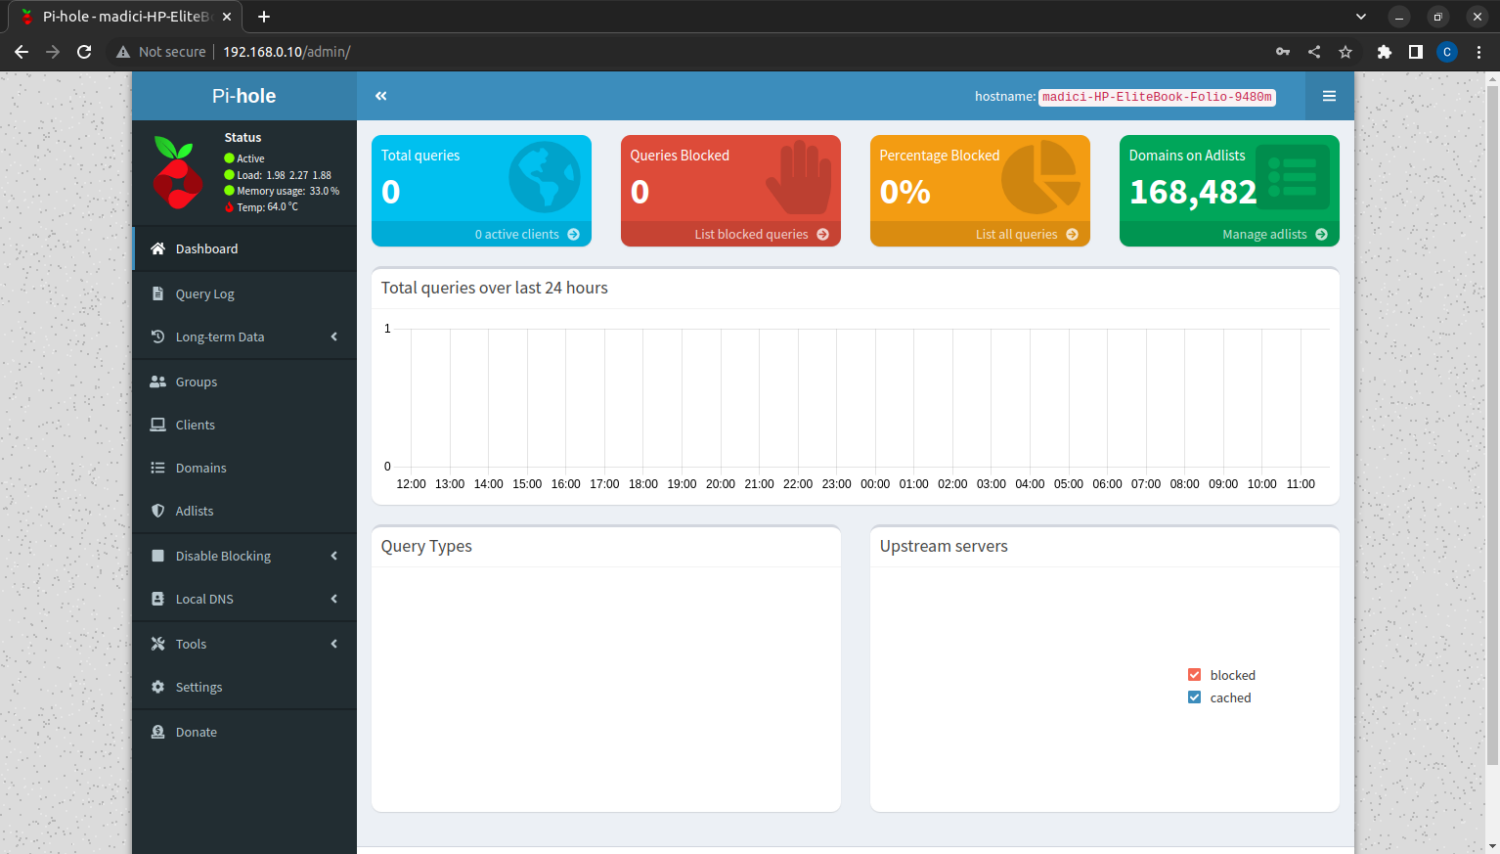
To show how to install Pi-hole on Linux, this install guide will cover how to install Pi-hole on Ubuntu, which is the most commonly used Linux distribution. The most recent release, Ubuntu 22.04.1 LTS will be used. Follow the following steps to install Pi-hole on Ubuntu #1. Update your operating system – before installing any software on Linux, it is good practice to update the operating system. Execute the following line in the terminal to install all available updates: #2. Configure a static IP address – since Pi-hole is a server, it needs a static IP address to function properly. A static IP address is an IP address that does not change unless you change it yourself. DNS servers use static IP addresses so that devices know how to connect. If they kept changing, users would also have to keep reconfigure the DNS servers on their computers to use the internet. To configure a static IP address if you already don’t have one: #3. Navigate to Settings, Wi-Fi and click the Gear Icon. If you’re using ethernet, go to Settings, Network and click the Gear Icon beside your wired connection #4. Click on the IPv4 tab and make changes to match the following screenshot #5. To confirm it has worked, open the terminal and execute: In the highlighted line, notice that we’ve added a 192.168.0.10 IP address and in the highlighted text, there is no word ‘dynamic’ which means the IP we set up is static. #6. In the terminal, run the following command to install Pi-hole Running the above commands begins installing needed dependencies, and it leads you to a prompt on the screen to setup up Pi-hole #7. On this first screen simply press Enter #8. Since Pi-hole is a free tool consider supporting it through donations by going to Pi-hole Donations. Press Enter to continue #9. Since we already setup a Static IP Address, press C to continue #10. Use the Up or Down arrow key to navigate to your preferred DNS provider. You’re free to pick any, but Quad9 (filtered, ECS, DNSSEC), Cloudflare (DNSSEC), or OpenDNS (ECS, DNSSEC) are generally recommended because of their excellent privacy policy. Once you’ve selected you’re preferred choice, press Enter to continue. #11. As mentioned earlier, Pi-hole uses a community-managed block list to block ad-serving domains and malicious sites. This is StevenBlack’s Unified Hosts List that Pi-hole suggests you add it. Press Y to add it. #12. The Admin Web Interface is an easy way to manage Pi-hole. Not installing it will not affect the functionality of Pi-hole. However, it is strongly recommended that you install it. Press Y to install it and continue #13. Press Y to install Lighttpd for use with the Admin Web interface installed in the earlier step. #14. For Pi-hole to show you accurate statistics on activity happening on the Pi-hole DNS. You need to enable query logging. Press Y to enable it and continue #15. Since you enabled logging in the previous step, here you select how much info you want to see. Level 0, Show everything, will keep a log of all domains visited by all clients(devices) using Pi-hole in the network. Use the UP and DOWN arrow keys to select the level of logging you want, then press Enter to finish the installation. However, don’t close your terminal yet. #16. If you installed the Admin Web Interface as recommended, you’ll be provided with login details to access the Admin web page. You’ll be provided with a link to the site and a password #17. To access the Admin Web UI, open your browser, enter the given web interface URL in this case, the given URL is http://192.168.0.10/admin and enter the given login password. You’ll end up at such a screen This dashboard will display all the needed info on your usage of the Pi-hole. In the top right corner, Domains on Adlist, in green, shows the number of domains. Pi-hole will block since we added its recommended block list. If you want to add a new website to the blocked list, Click on Manage adlist just below the 168,482, which shows the number of blocked domains. #18. The final step is to configure the router you’re using to use your Linux computer where you have installed Pi-hole as its DNS server. Since routers are different, the method to do this will vary. Therefore, refer to your router’s manual to find out how to do this. Pi-hole Documentation also has a page on how to do this on different routers. Go to Pi-hole as a DNS server to find out how to do this. The next is to find out if Pi-hole is working on your devices.
How to know if Pi-Hole is working correctly
Pi-hole is set up to block ads on a network. Therefore, a simple way to know if Pi-hole is working is to open a website you know typically has ads, particularly news sites such as CNN, BBC, Reuters, etc. An even simpler method is to open this site Pi-hole test site. If you do not see ads on the page, Pi-hole is working. However, if you see ads on the site, Pi-hole is not working. Consider checking your router configuration.
Challenges in Pi-Hole Setup
Pi-hole, just like other tools, is not perfect. You may encounter some of these challenges while using Pi-hole:
Pi-hole won’t block all ads
Advertising companies are aware of DNS ad-blocking tools like Pi-hole. Some companies overcome the hurdle of DNS ad blocking by putting ads right into the application’s code, such as in games or making ads part of the streaming data, such as in the case of YouTube. Therefore, you’ll still see YouTube ads because these ads come as part of the video you’re streaming and are not served separately.
Pi-hole leaves a space
Unlike browser-based ad blockers, which remove the space that would have been taken up by ads, Pi-hole does not remove them. Instead, you get a blank space where ads would have been placed. This can get irritating on small-screen devices.
Pi-hole blocks ads on all devices on a network
Since it is a network-level ad-blocking tool, it won’t discriminate against devices on the network. Worse still, there is no interface to disable blocking on some devices easily. Thus, you have to change the DNS settings on those specific devices manually. This is because even if you turn off Pi-hole, you won’t be able to connect to the internet without resetting the DNS settings on the router or the devices involved. Although it has its shortcoming, Pi-hole is still very useful in protecting users and making their experience surfing the internet more pleasant.
Author’s Note
Pi-hole is a very useful tool for anyone using the internet. Aside from just blocking irritating ads that can make surfing the internet an annoying experience, it can protect your privacy online, blocking internet trackers placed on devices to monitor users’ internet activities. Additionally, it can protect your computer from accessing malicious sites that can malware or ransomware infection. Aside from that, it can protect network users from accessing harmful sites. Even though its installation can be tedious, Pi-hole is a tool that anyone using the internet will find very useful.

![]()


